I thought I’d do a quick screenshot tutorial of how I upgrade Ares. There are lots of other ways to do it, but here’s mine. My set-up:
- Live game
- Test game on the same server (/home/arestest/aresmush & /home/arestest/ares-webporta)
- I have a lot of custom code, so I do my coding on the test server before pulling to my live game. This means I’ll usually have 6-12 conflicts to sort through on upgrade.
- Github Desktop
- I use this to manage pulling from the main Ares repo, pushing local changes to git, and pulling from my fork to my live game.
- Git fork that tracks (almost) all changes to the game, including config. The test game and live game have different databases.
- mRemoteNG
- A program that allows you to open multiple shell tabs in one window. I often have 3-4 open, so this just saves screen real-estate. Also saves your server passwords.
- Atom
- My code editor. It has some git functionality built in that I only use on upgrades, but it’s handy. I use a plug-in (Remote FTP) to save directly to my test server.
My usual code workflow:
- Start up my test game and/or portal in mRemoteNG
- Create a new branch in Github Desktop
- Code in Atom.
- Files save directly to the test game AND locally to my computer.
- When the code is mostly working (or I need to break), commit changes to my git branch using Github Desktop.
- I try to do this after each ‘piece’ is working rather than the whole thing, because it’s easier to track changes later if you need to.
- Push my changes to fit using Github Desktop
- When the whole code project is ready, merge the branch into master on the Github website
- (there’s probably a better way to do this, but it works for me!)
- Pull the code to the live game (either doing ‘git pull’ on the game or on the server shell) and load appropriate plug-ins.
UPGRADING ARES WITH TAT
-
Clean pull to test server from git master
I do this because sometimes I end up with weird untracked things because I save my code directly to this server. This ensures that the test server and live server are running the same thing.
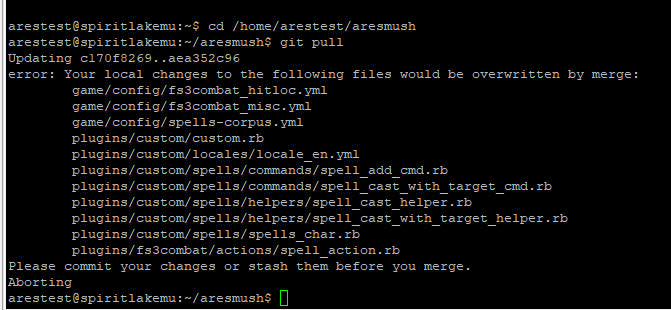
It’s showing me uncommitted changes, but I know my master fork is correct, so I just stash them (git stash) and try the pull again.
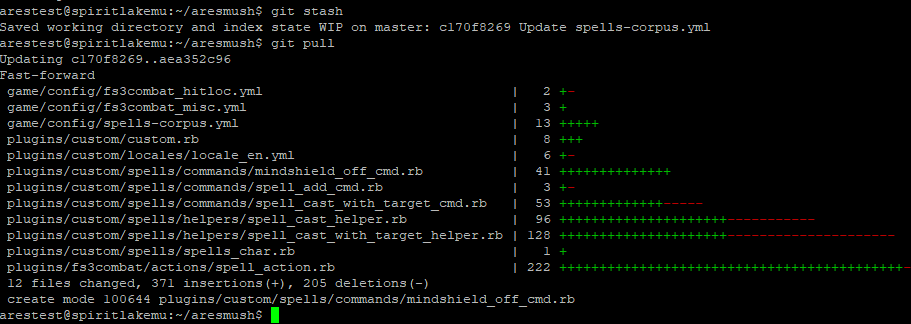
This time it worked fine, and now my test server is running a clean version of my master git branch.
-
Create a new branch
This is mostly my paranoia. I just like having upgrades in their own branch.
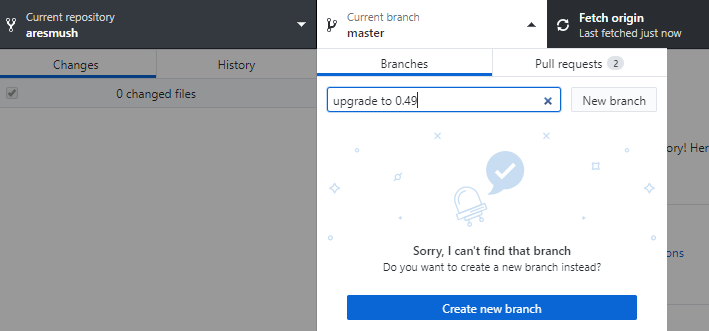
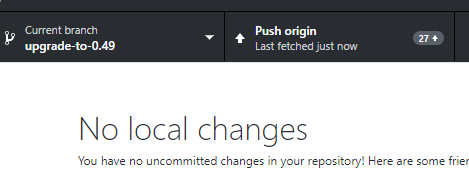
Be sure that your ‘fetch origin’ status says ‘just now’ You don’t want to create a new branch from old code.
Click on ‘current branch’. Type in the name of the new branch. Click ‘create new branch’. Follow instructions.
- Pull the upgrade from Ares
- Click on ‘history’
- Type ‘upstream master’ into the search bar
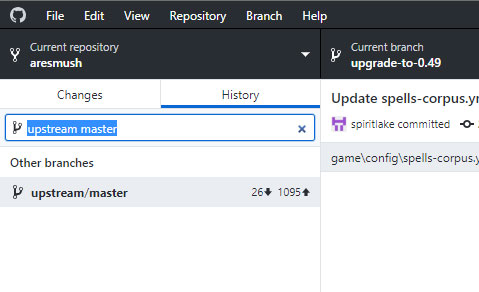
- Click on ‘upstream master’
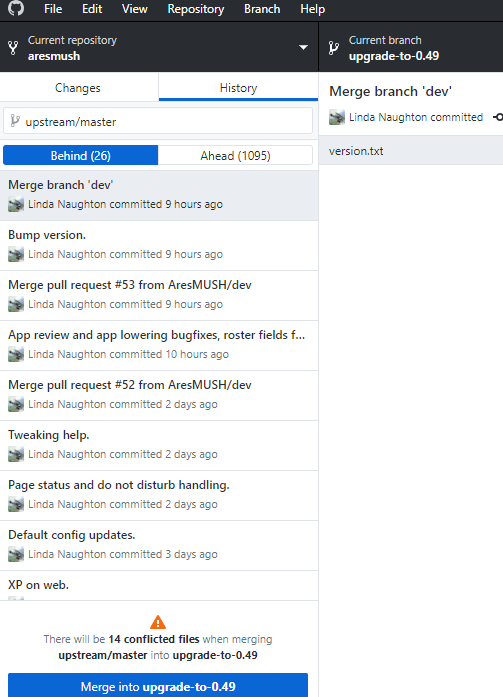
You’ll now see how many conflicted files you have (at the bottom). This time around, I have 14.
Click ‘merge into upgrade-to-0.49’ (or whatever you named your branch).
Give it a second. Github Desktop is always slow on this bit for me.
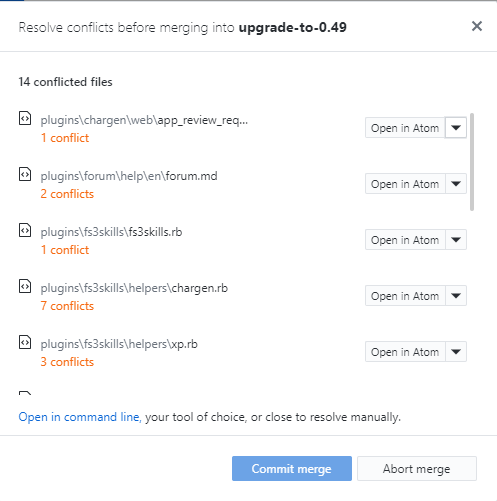
- Resolve Conflicts
You’ll now see a window asking you to resolve conflicts. Click ‘open in Atom’.
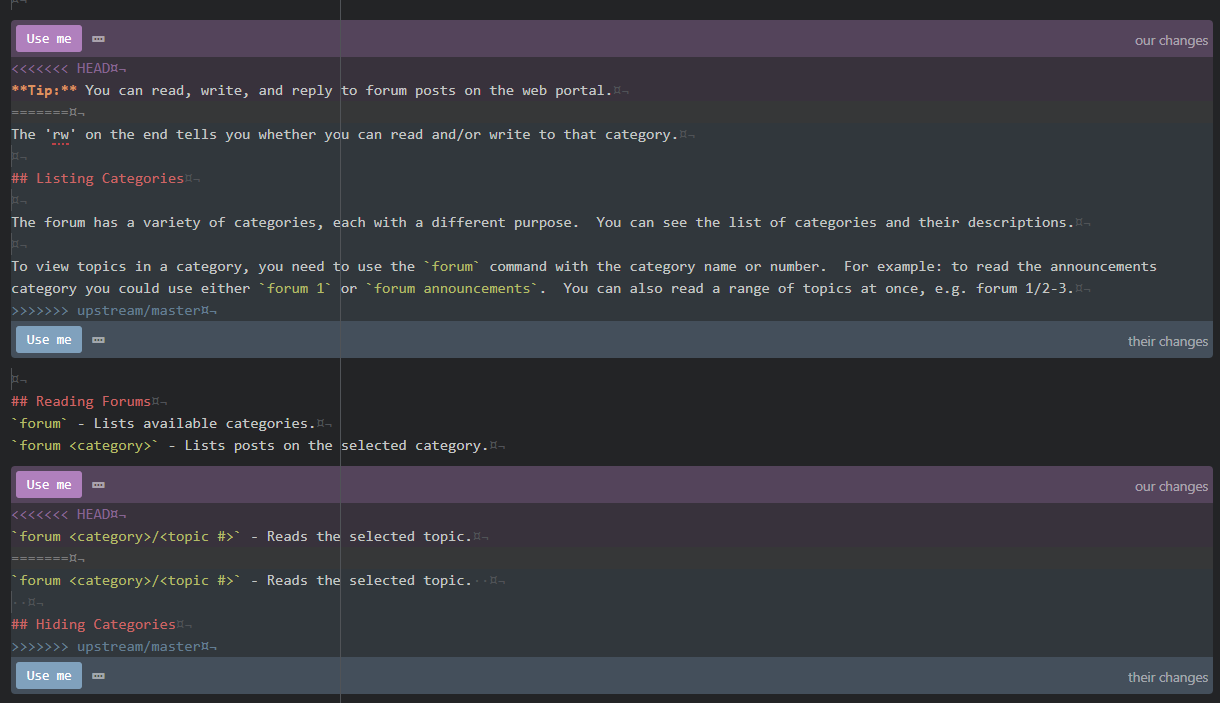
In Atom, you’ll find conflicts highlighted like so. Resolving conflicts is usually a matter of clicking the correct ‘Use me’ button.
You can still manually merge the changes if you need to keep pieces of both changes - just delete the <<<<<<< HEAD and ======= and >>>>>>> upstream/master markers.
Select the correct code (usually ‘their changes’, which are Faraday’s changes) and then save. Note that ‘our changes’ doesn’t necessarily mean that YOU changed that specific piece of code. It just means it’s what’s on your server. It’s often Faraday’s older code.
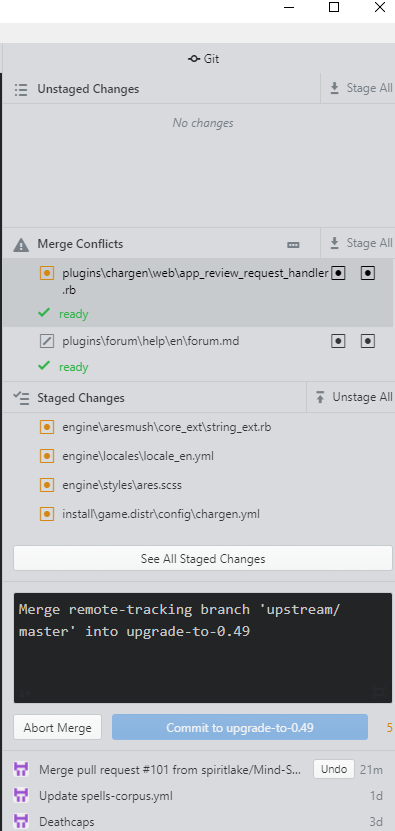
Because Atom is integrated with git, I can turn the git sidebar on (‘packages, GitHub, toggle GitHub tab’), and now I can see all the conflicts (‘Merge Conflicts’) I need to resolve in the tab instead of going back and forth between GitHub Desktop and Atom.
It gives me a handy green check mark when I’ve resolved all the conflicts in that file, and I can click on the next file to move down the list.
Click through the files, resolve the conflicts, and save each file as you go.
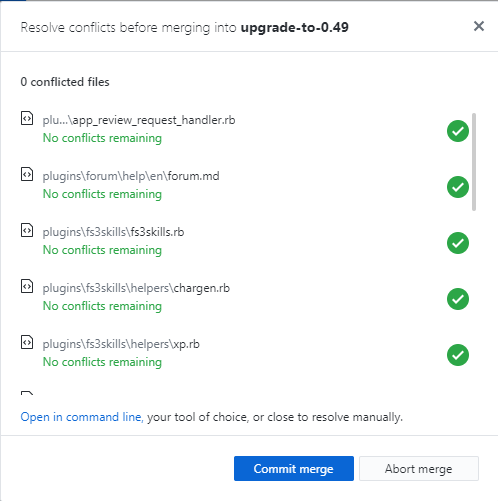
Eventually you should see a nice list of green check marks in GitHub Desktop, and you can click ‘commit merge’.
- Commit and push to GitHub
Commit your merge and push it to GitHub.
It’s now on GitHub in the branch you created.
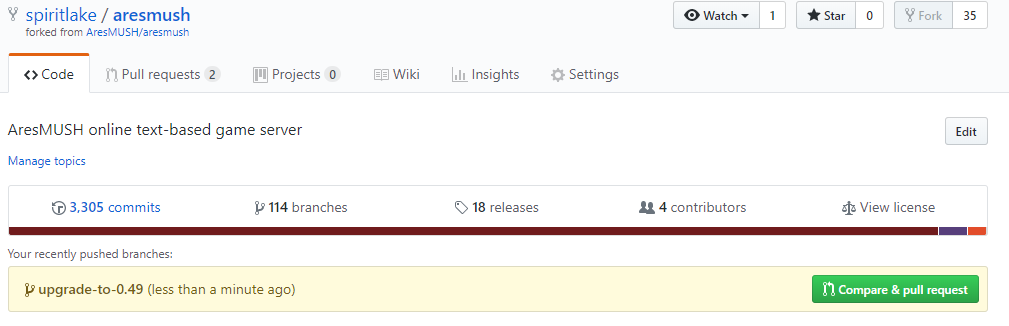
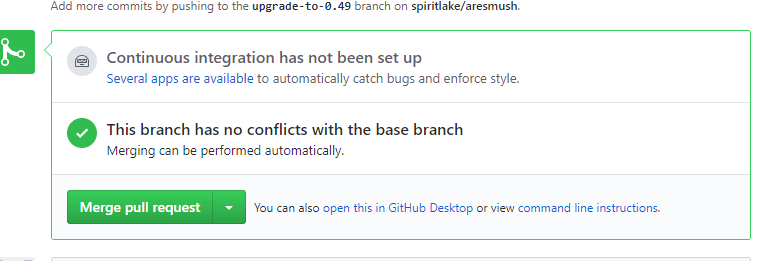
- Merge into Master
I merge my branches on the website, because it’s pretty easy to do. Visit your repository, and you’ll see an alert box with your recently push branches. If it’s been a while and you don’t see the box, just click on ‘branches’ and create a pull request there.
Change your base repository to be your master branch and create a pull request. If you accidentally create a pull request to Ares instead, you can just close it and try again.
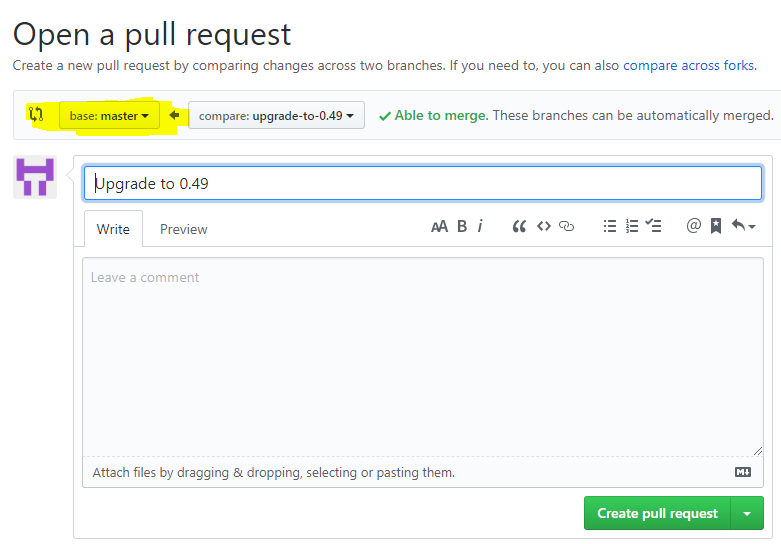
Usually you’ll have a green ‘Able to merge’ and can just merge it right in to your master branch.
- Repeat for Web Portal (maybe)
Repeat all the above steps for the web portal, if you have them in different repositories (I do). If they’re in the same repository, you may have already done these files.
- Pull to server
Now your upgraded code is in your master branch - so all that’s left is to pull it to your game! This is probably best done on your test server, but if you like to live dangerously, you can pull it to your live game.
You can pull to your game from the game itself or from the shell. You could also use the ‘upgrade’ command at this point on game (it will ‘upgrade’ from your master branch).
You’ll can pull to your web-portal from the shell.
- Finish up
You’ll also need to
bin/migratein /home/ares/aresmushload allor restart the game (depending on the upgrade instructions)bin/deployin /home/ares/ares-webportal (if you don’t restart the game)
Hooray, we have updated Ares! Now we wait for things to break. ![]()